Step-By-Step User Guide
Step #1
The inputs and menus of the Panasonic S5, S5ii, and S5iix are nearly identical so this tutorial will be useful for all models.
Step #2
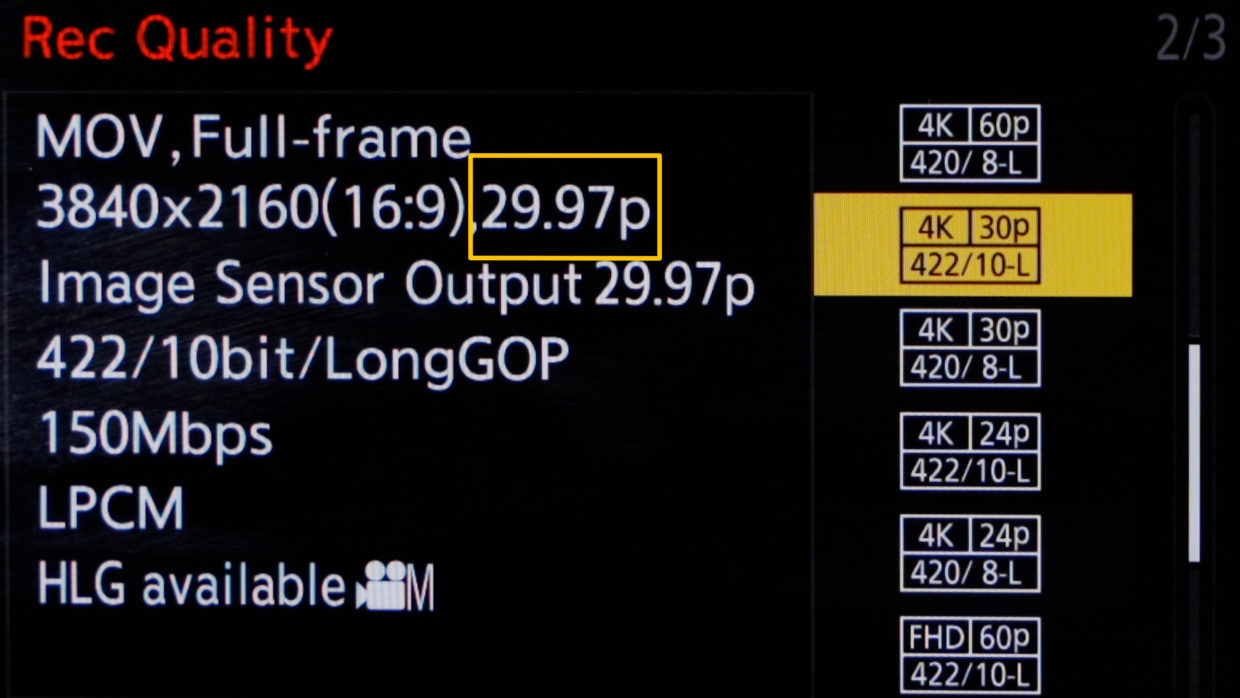
First, confirm your frame rate.
In this tutorial, we’ll be using 29.97.
Step #3
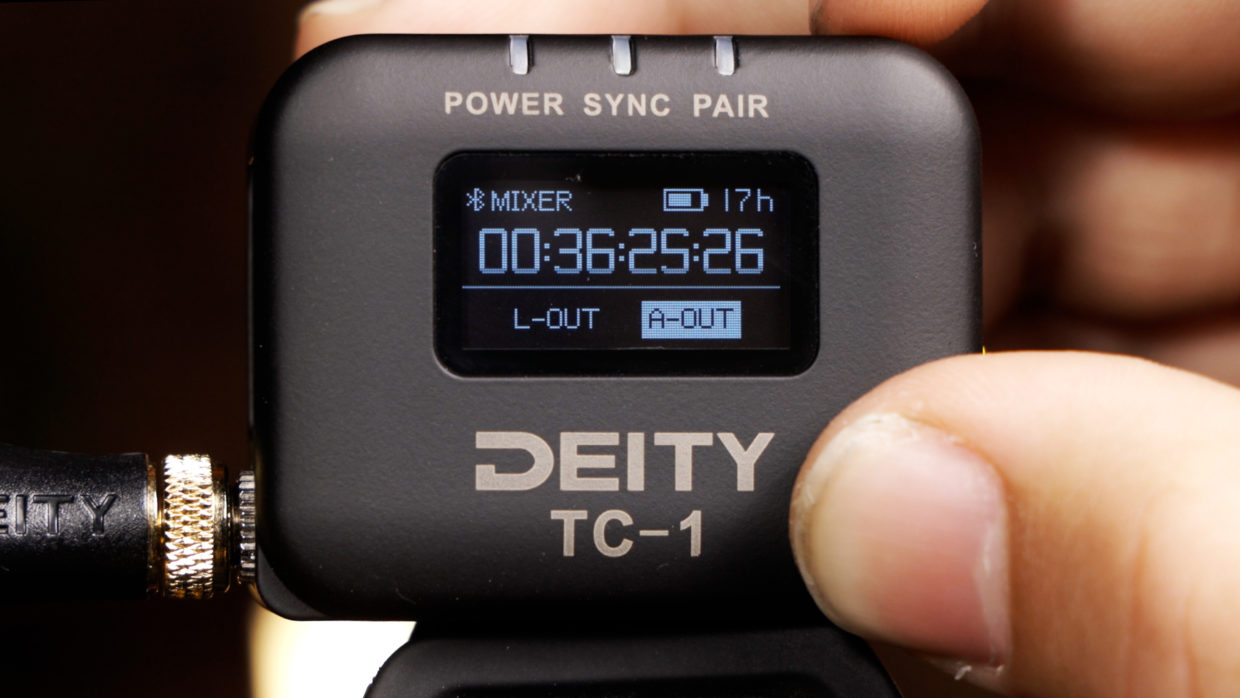
On your Deity TC-1, scroll over to the frame rate section and match it to the camera.
Next, scroll over to the out type section and select “A-Out.”
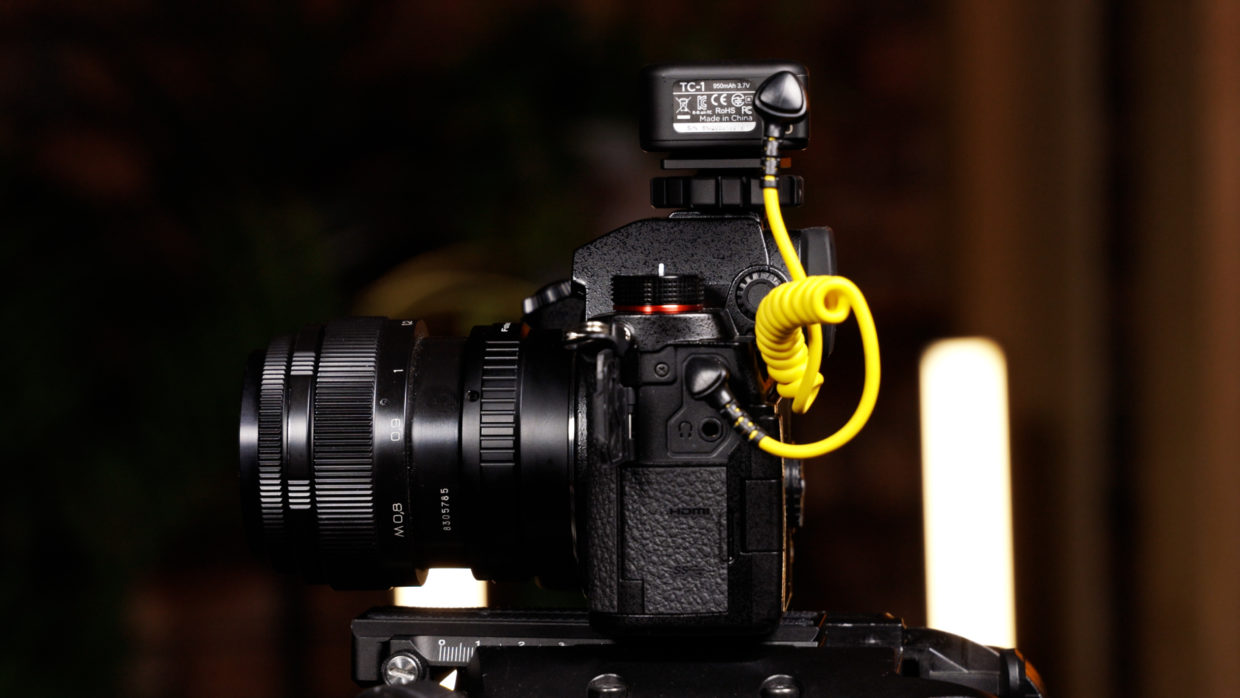
Step #4
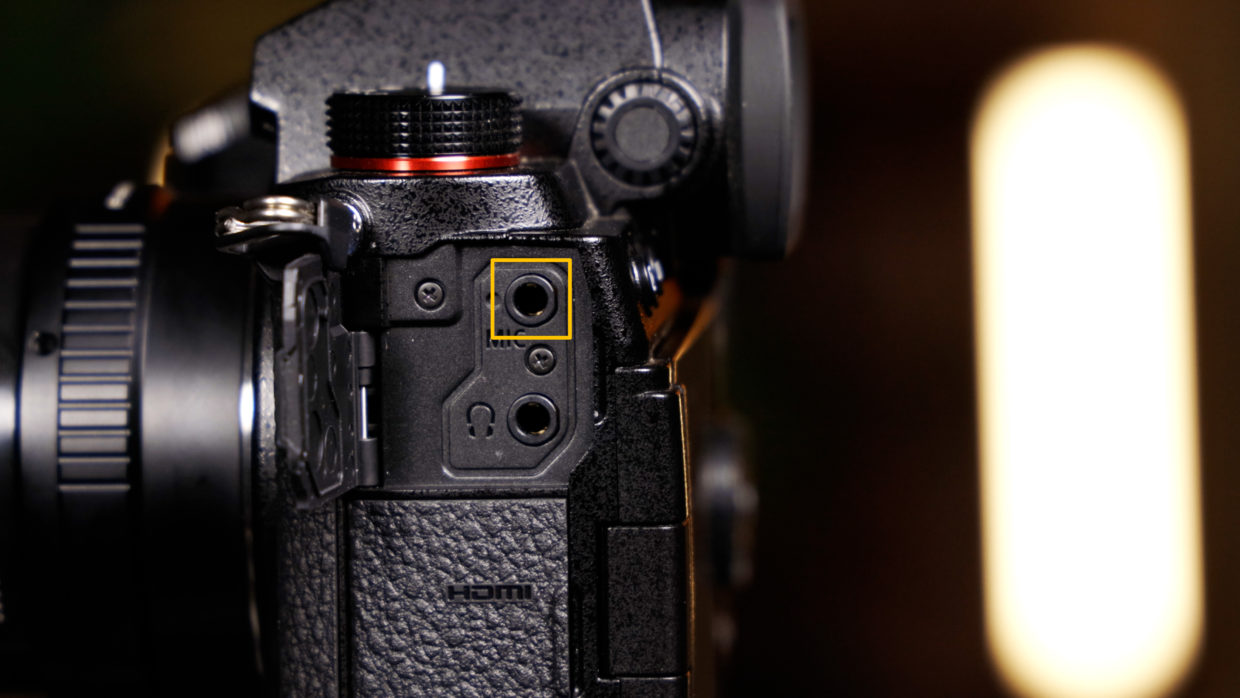
To connect the TC-1 to your camera you need a locking TRS to TRS cable.
Locate the microphone jack on the left side of the camera and plug it in.
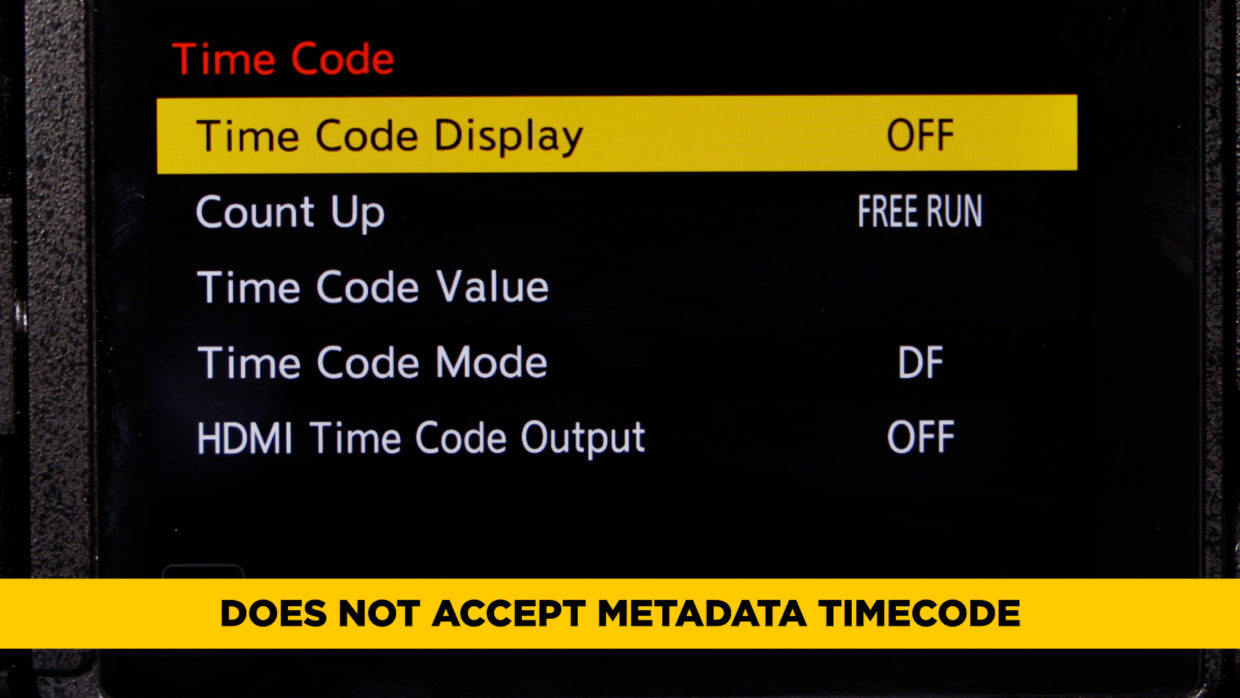
A Brief Note
Before we dive into the camera’s settings we want to acknowledge that there is a timecode submenu on the S5. The catch is that it doesn’t accept external timecode.
That’s alright, we can use LTC audio timecode instead.
Step #5
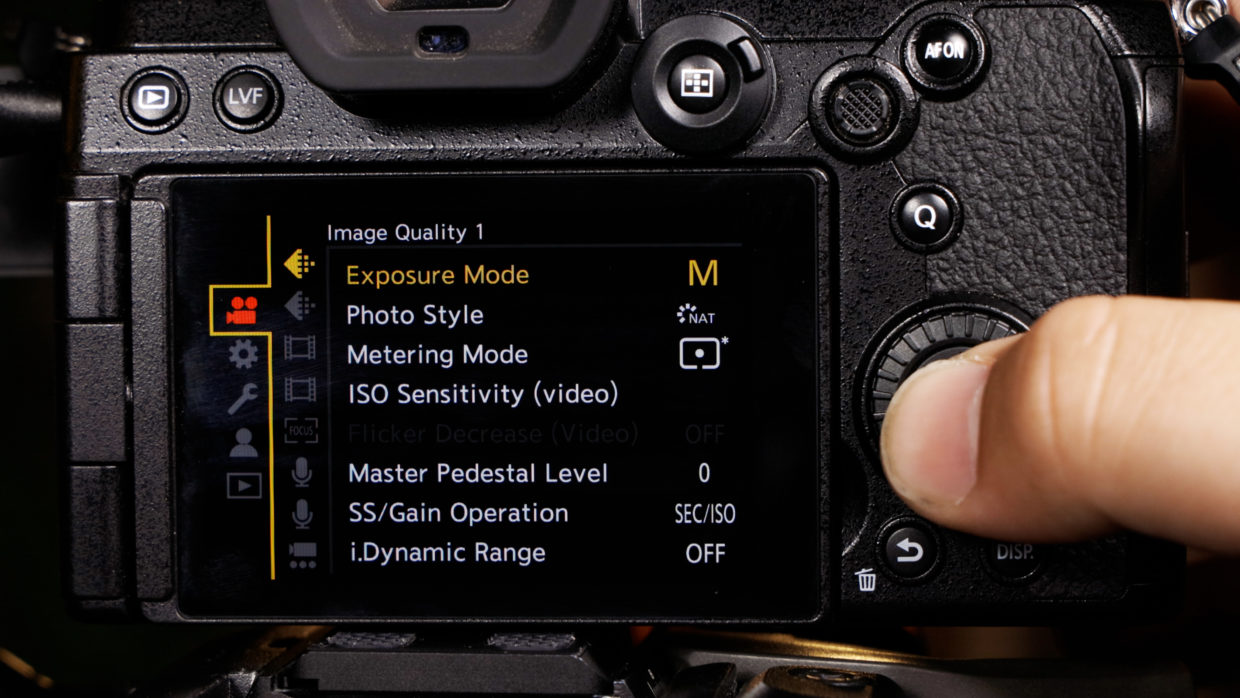
In your camera’s menu, go to the camera icon, and then the 1st microphone icon.

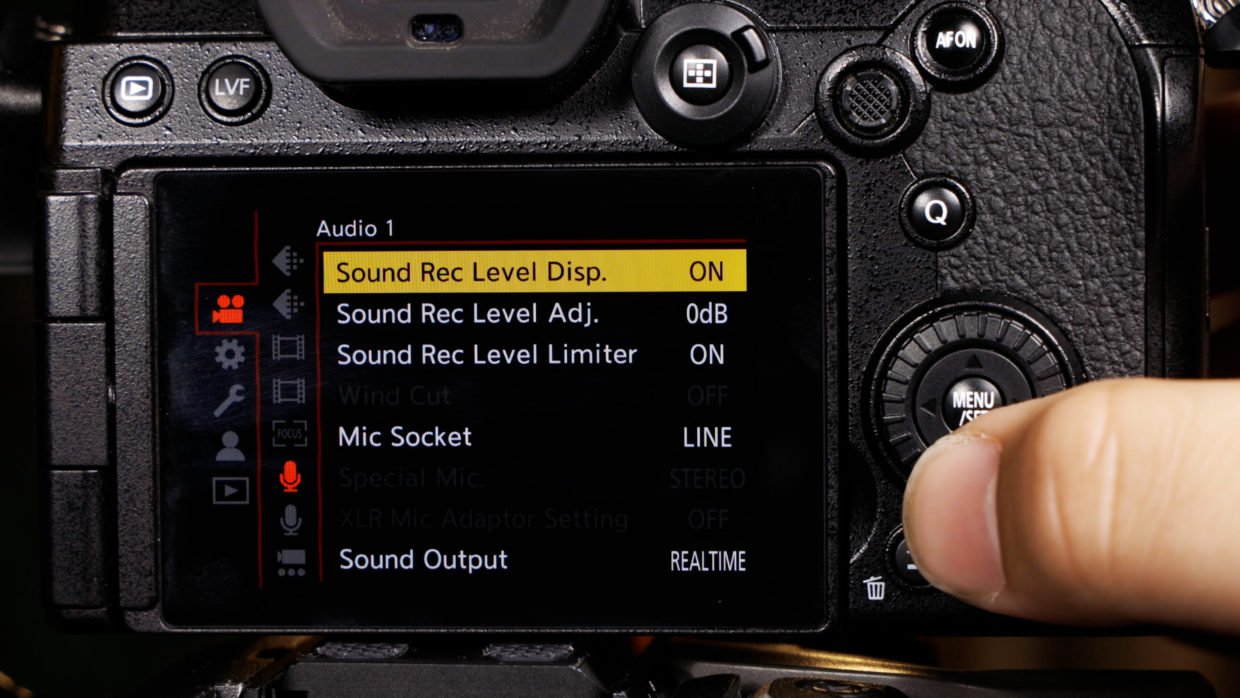
Step #6
Inside this set your “Sound Record Level Display” to “on.”
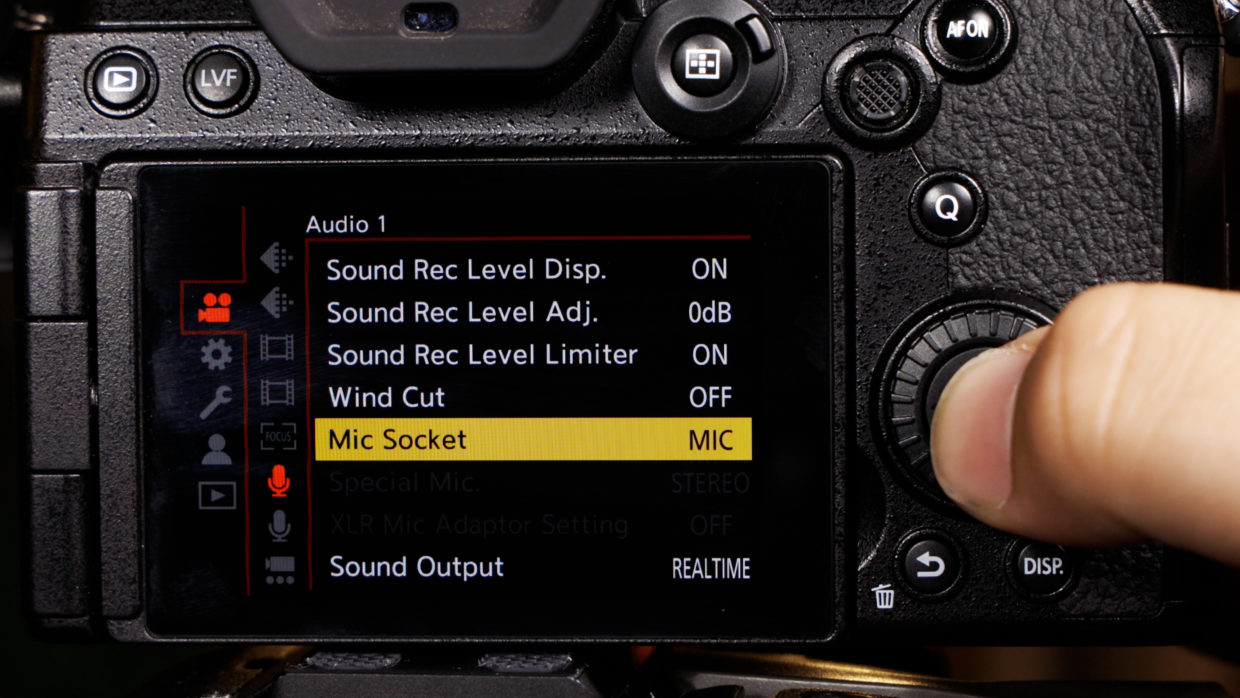
Step #7
Next, set your “Mic Socket” to “Mic” level.
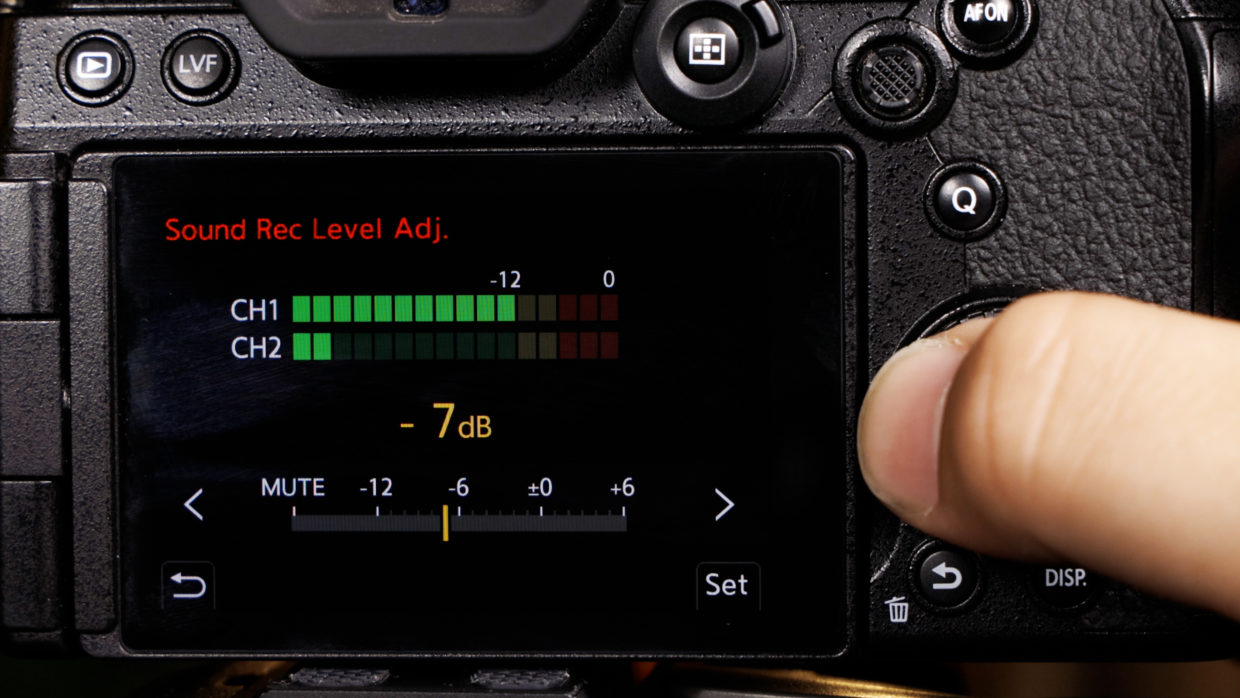
Step #8
Finally, go to “Sound Record Level Adjustment” and reduce the gain until channel 1 is roughly -12dB.
Here you can see our timecode on the left channel, while the TC-1 scratch audio is on the right.
You’re Connected!
Your Panasonic S5 is ready to be synced with the rest of your devices!
If you need help syncing your Deity TC-1 to your other Deity TC-1 timecode generators, here is a User Guide!
Connect all your devices to your phone or laptop via Sidus Audio™️. With our app, you can control your device’s settings, monitor their status, and sync all your units at once. Learn More
For the user guide to Sidus Audio™️ Click Here


Drop a comment down below if you have any cameras or mixers you’d like to see tutorials for!