Step-By-Step User Guide

Step #1
Inside of DaVinci Resolve, we’ve imported our clips. For this shoot we were using two C300s and a Zoom F8, all of them being fed timecode from Deity TC-1s.
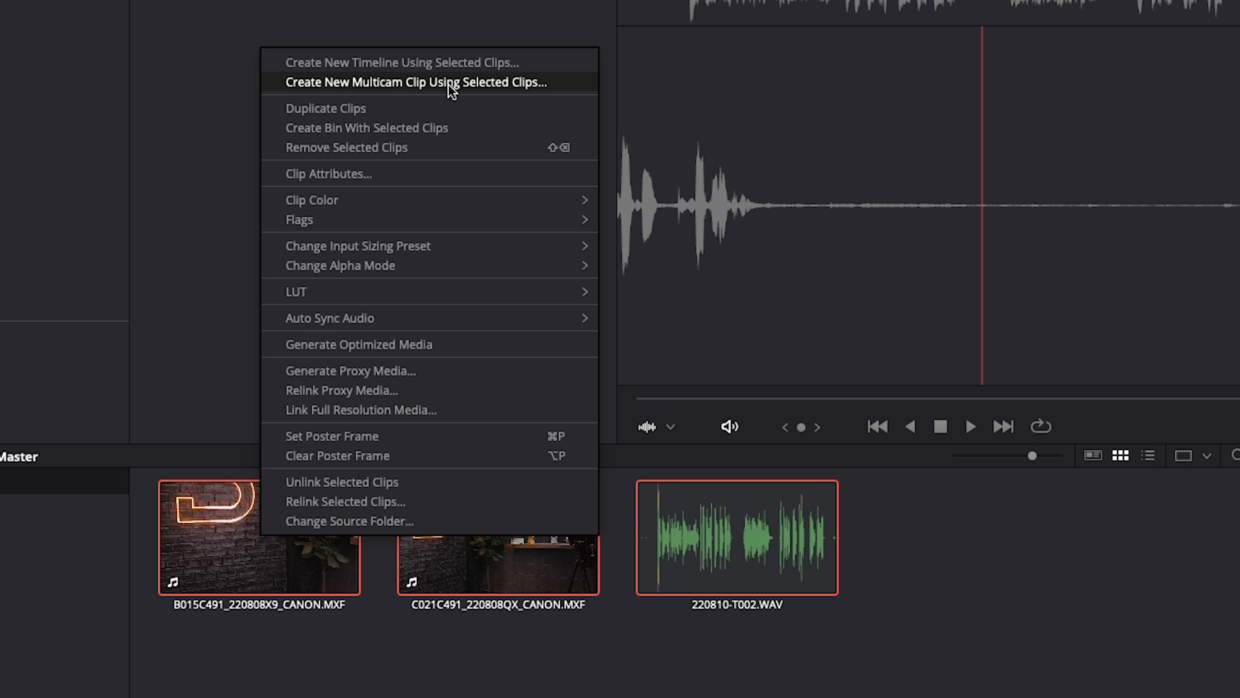
Step #2
Highlight all of the clips that you would like to sync and right click.
In this Options menu, select “Create New Multi-Camera Clip Using Selected Clips.”
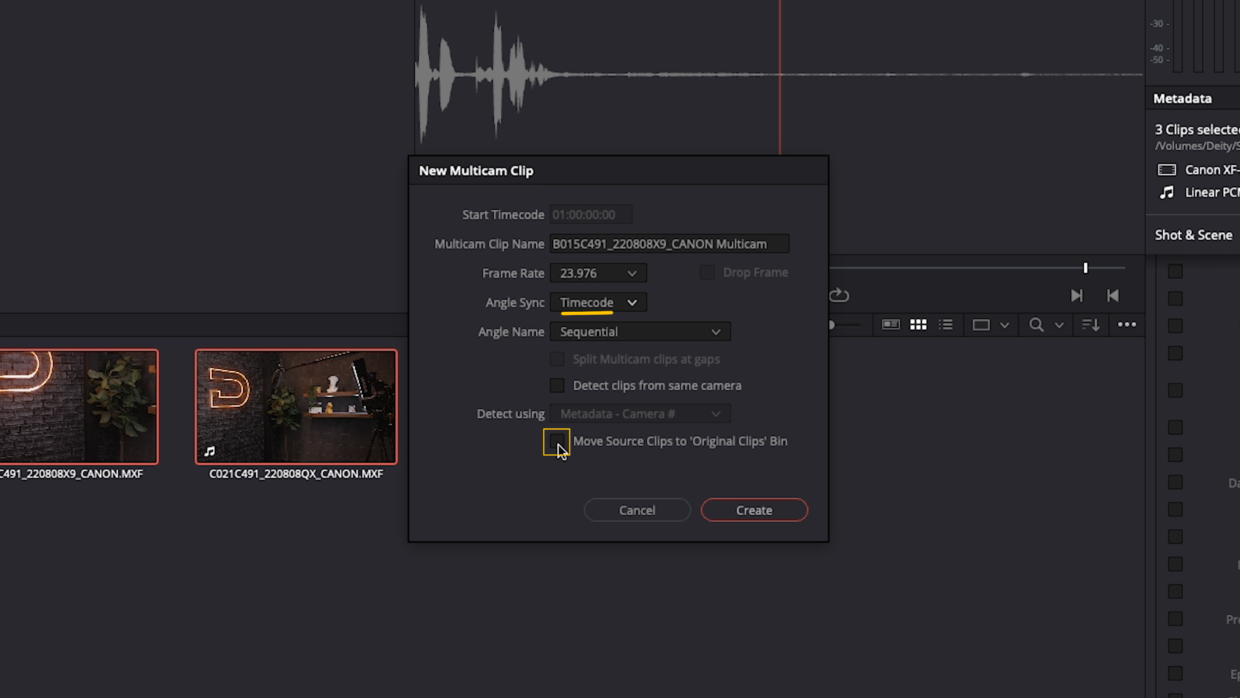
Step #3
Make sure “Timecode” is selected as your “Angle Sync.”
If you don’t want your clips placed into a new bin after syncing them, uncheck “Move source clips to ‘Original Clips’ Bin.”
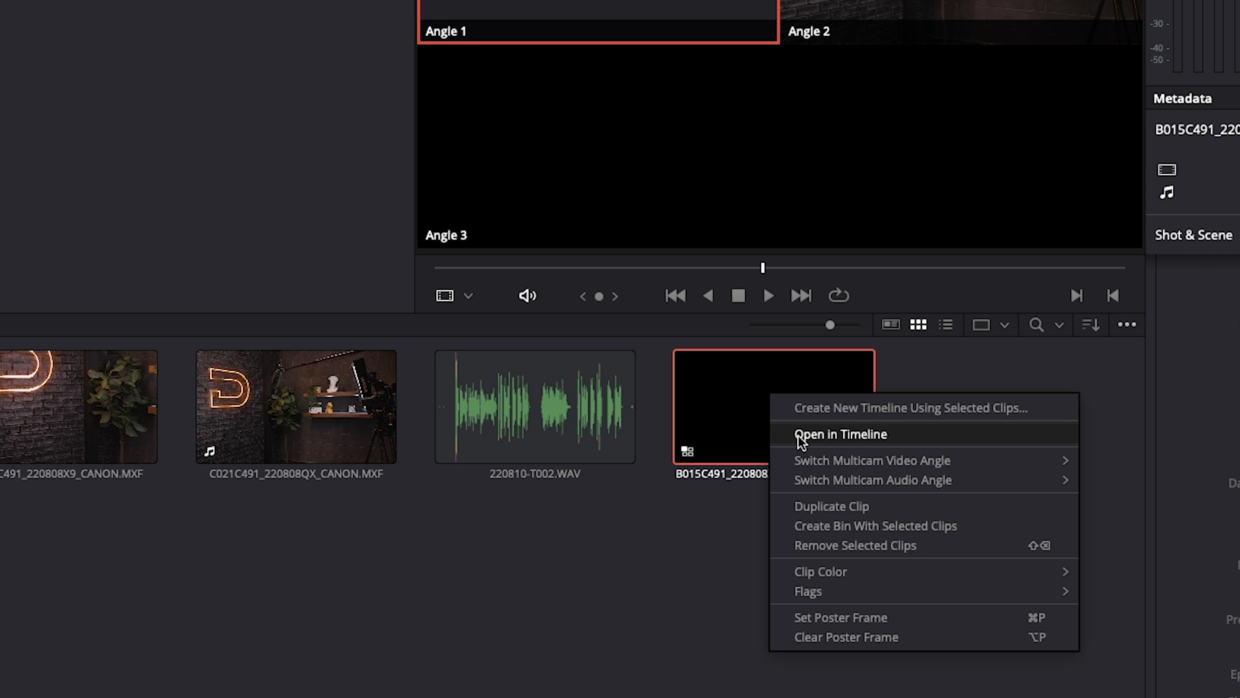
Step #4
Back in your media browser, right click the new multi-cam clip and select “Open In Timeline.”
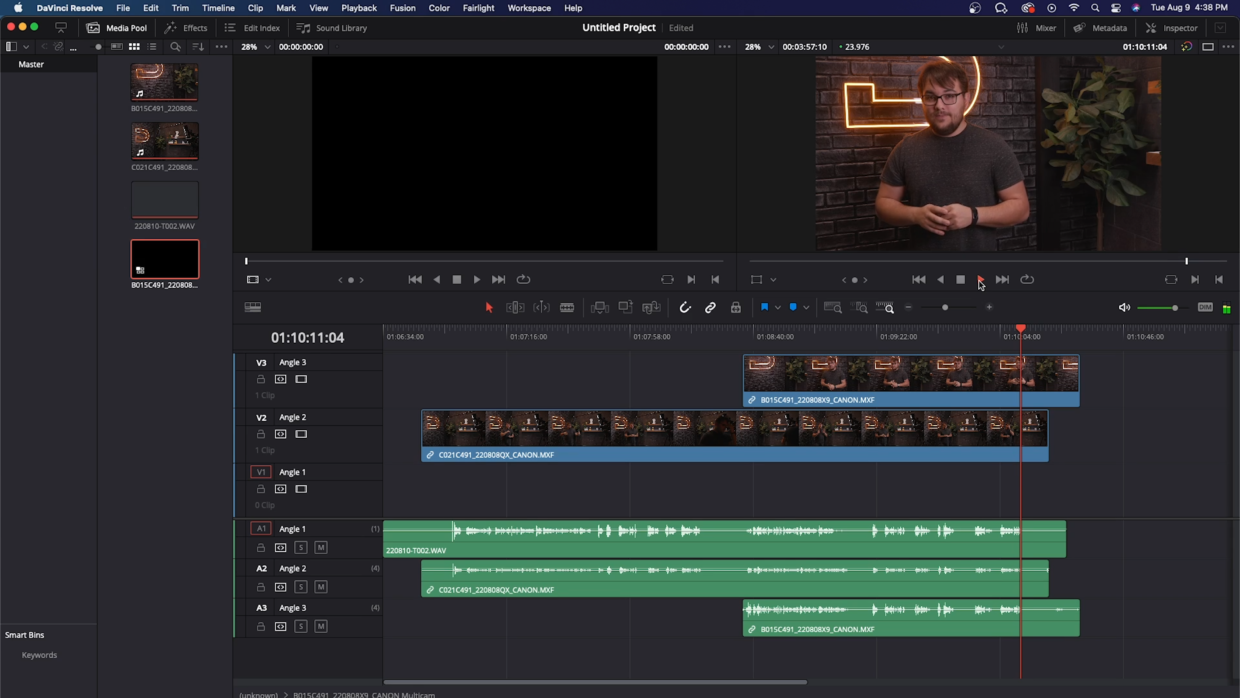
You’re Ready To Edit!
Your clips are now perfectly synced and you’re ready to dive into the edit!
Looking for an easy timecode solution to speed up your editing? Check out our Deity TC-1!
Drop a comment down below if you have any timecode tutorials you want to see next!