Core concepts
There are eight phases to editing a professional podcast, all of which will be explored here using Adobe Audition.
• Collecting Assets
• Gain Adjustment
• Sweetening
• The Cutting Process
• Add Music
• Add Intro/Outro & Ads
• Mastering
• Exporting

Phase 1: Collect assets
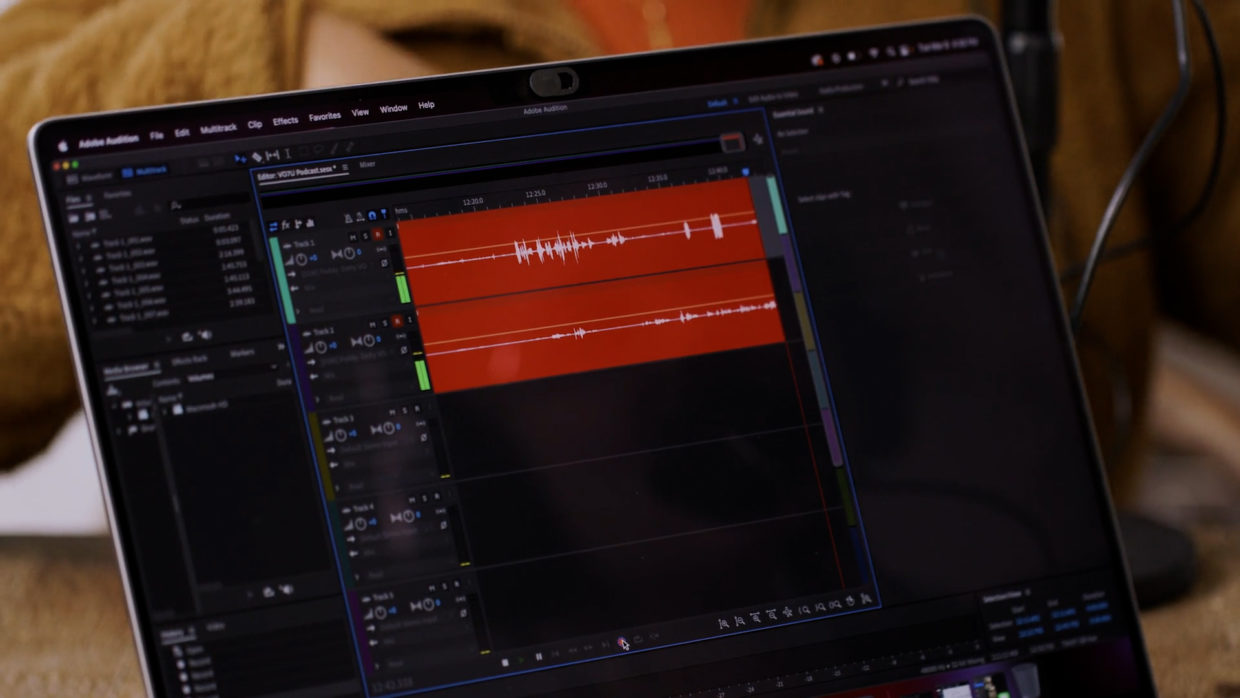
Before you or your editor dive into an edit, make sure to have all assets prepared and in one place.
When you have dozens of episodes on your hard drive, this will help make the post process easier to navigate.
Asset Checklist
• Recorded Audio
• Co-host or Guest’s Audio
• Theme Music
• Intro / Outro
•Ad Read(s)
Phase 2: Gain Adjustment
Audio balancing takes your audio’s high and low levels and brings it all closer together for a more consistent sound.
This is different than “Mastering” which is discussed more below.
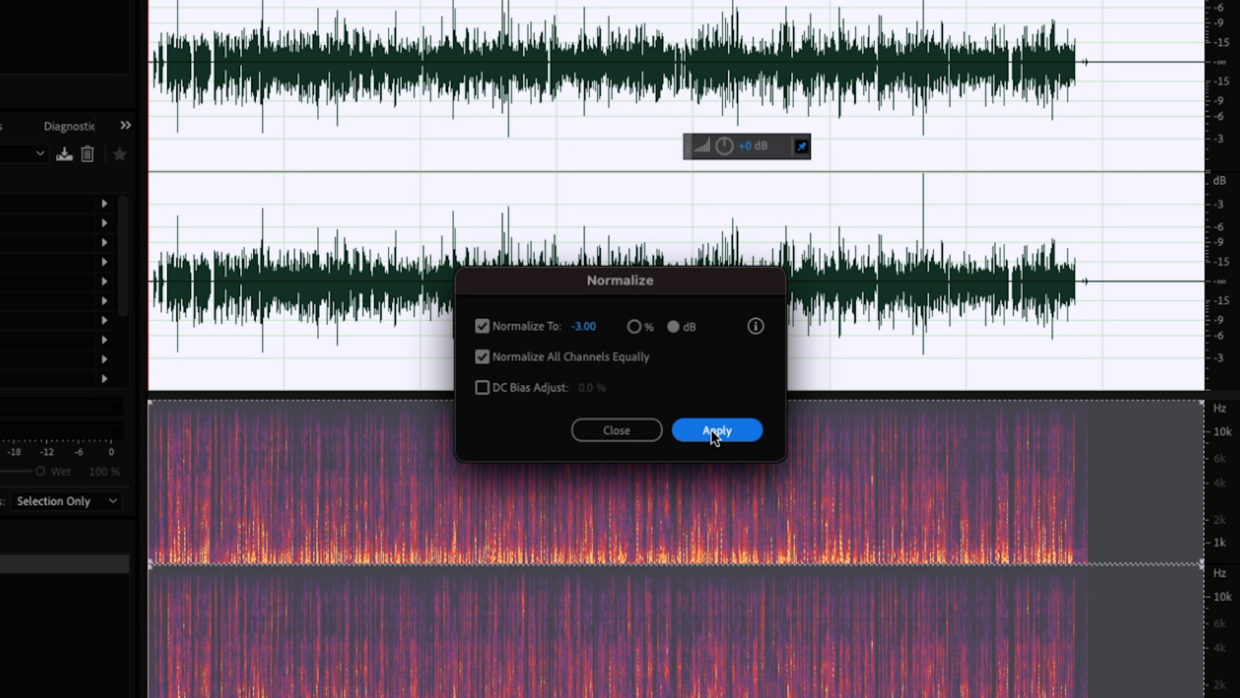
Normalize
Normalization is the averaging of audio volume in relation to the loudest peak of the clip. This is the first step in making your audio consistent and balanced.
• In Adobe Audition select your individual’s audio and highlight the entire clip.
• Go to Effects, Amplitude & Compression, and then select Normalize.
• Inside this menu make sure dB is selected, and set the parameter to -3dB
• This amplifies the entire track in proportion to the highest peak and will ensure the highest peaks never pass -3 dB.
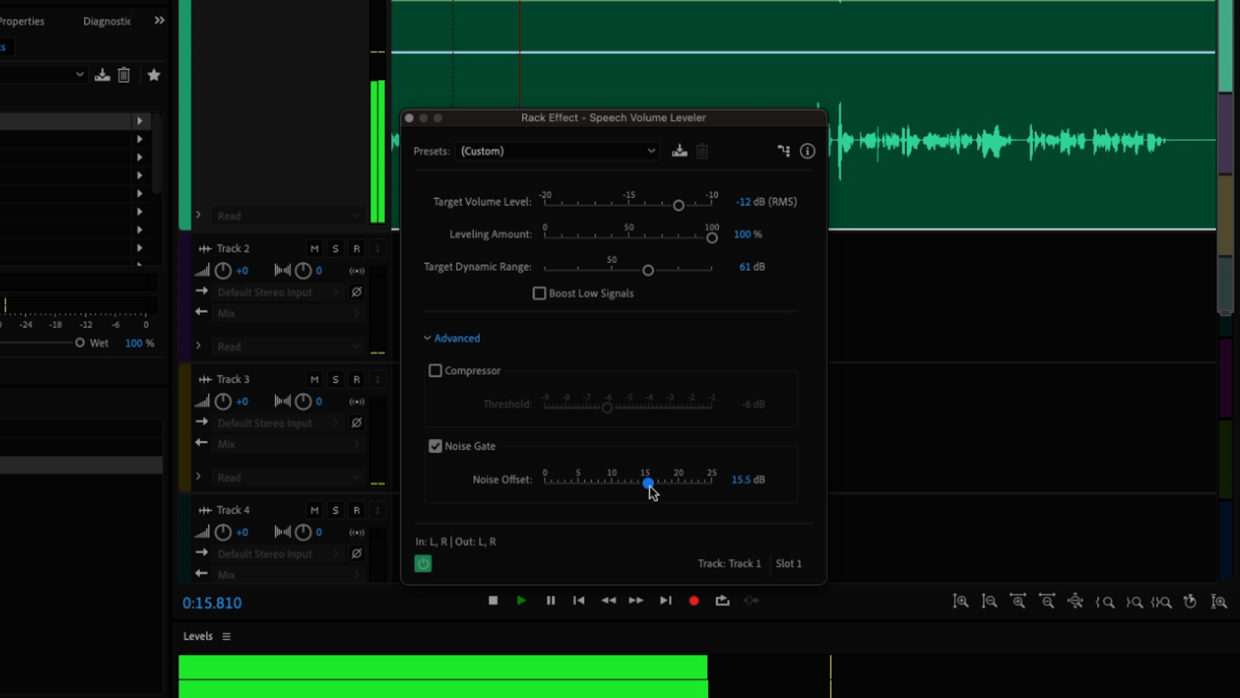
Level Your Audio
Speech Volume Leveler takes your track and brings everything to an average volume.
• Select the clip itself or the track that the clip is on and go to Effects, Amplitude and Compression, and then Speech Volume Leveler.
• Select Default, to start.
• You’ll notice this brings everything up, even your breath and the quiet sounds between talking.
• To fix this, adjust the target dynamic range until only the voice is affected.
• If you’re recording in less-than-ideal conditions, there is also a noise gate in the advanced tab of this window. The further you push up this dial, the more noise will be removed.
Phase 3: Sweetening
This step is all about bringing out the best in your host’s voice.
Sharpening up their presence and adding the oomph we associate with good professional audio.
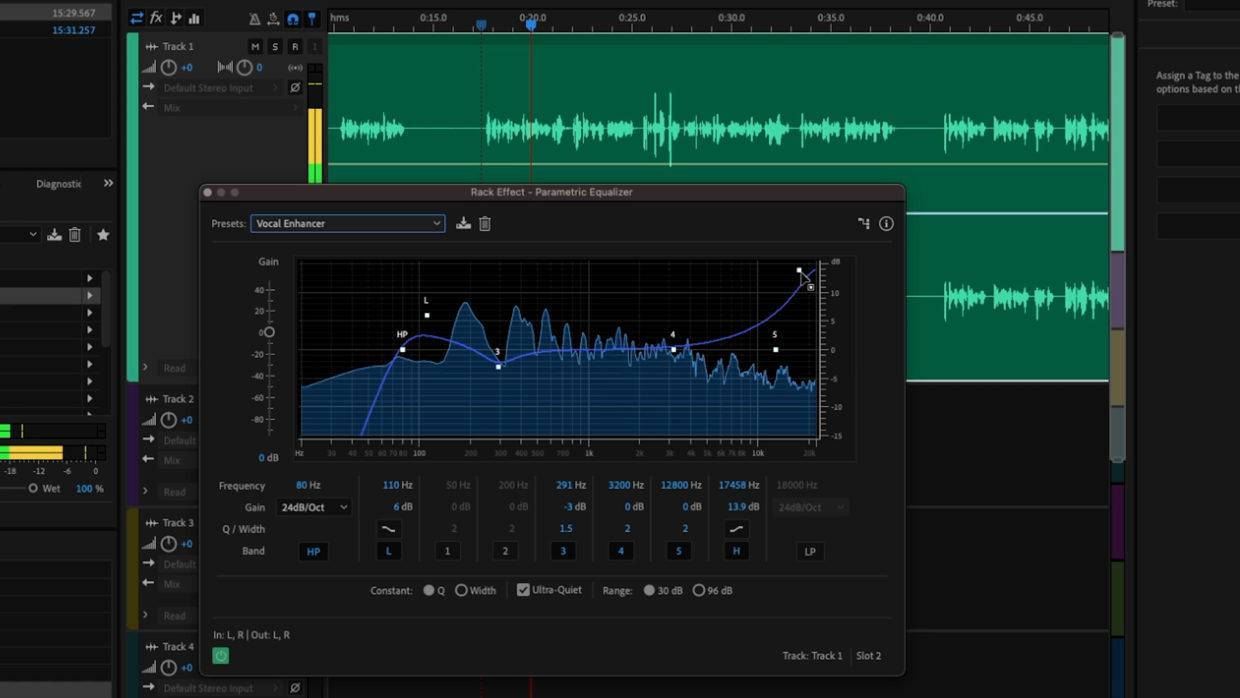
EQ
EQ allows us to control the individual frequencies of our voice and dial them in, just how we like.
• In Adobe Audition, select your track and then go to Effects, Filter & EQ, and then select Parametric Equalizer.
• Take some time to understand how each of the nodes affects the clip and its sound. For this tutorial, we’ll use the preset Vocal Enhance. This will apply a highpass filter to remove low-end frequencies such as noise and bring up high-end frequencies to make our voice crisper.
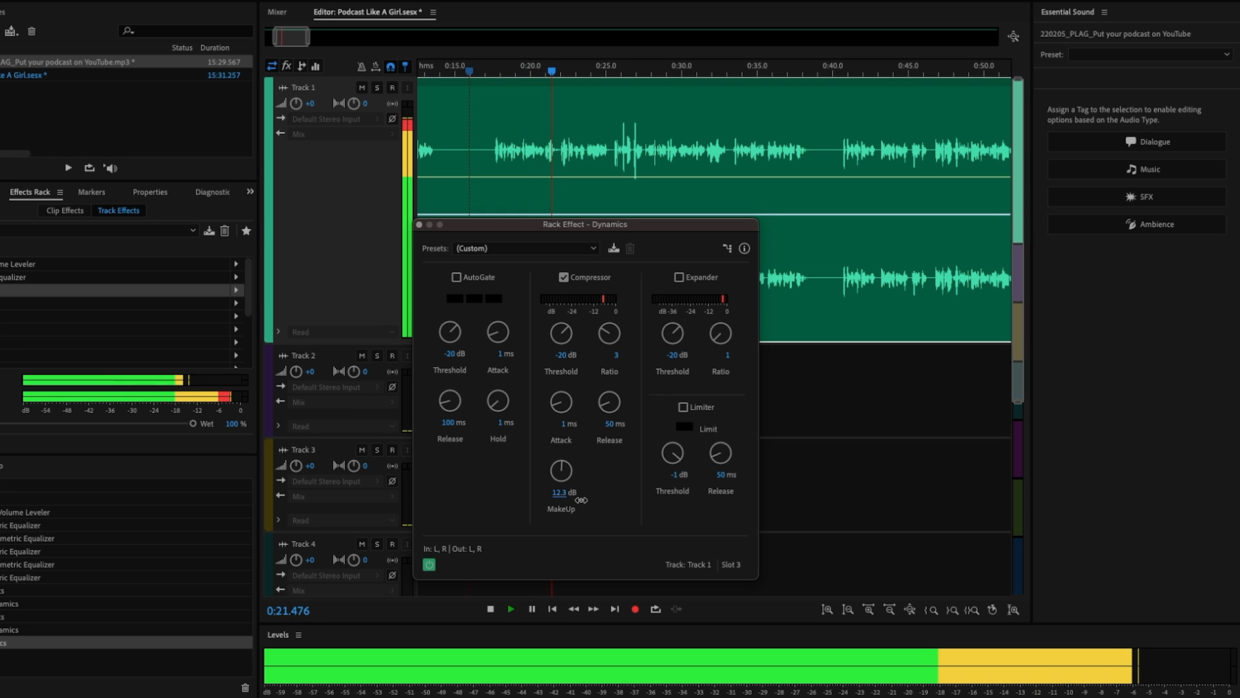
Compression
Compression adds punch to the audio to makes it louder and more present.
• Select your track and go to Effects, Amplitude & Compression, and then Dynamics.
• We’ll only be working with the compression tab of this window. Check the box to enable it.
• A good ratio for voices is 3, and a threshold of -20dB will work for us.
• This compression will lower our volume, so adjust the Makeup until the clip is nice and loud.
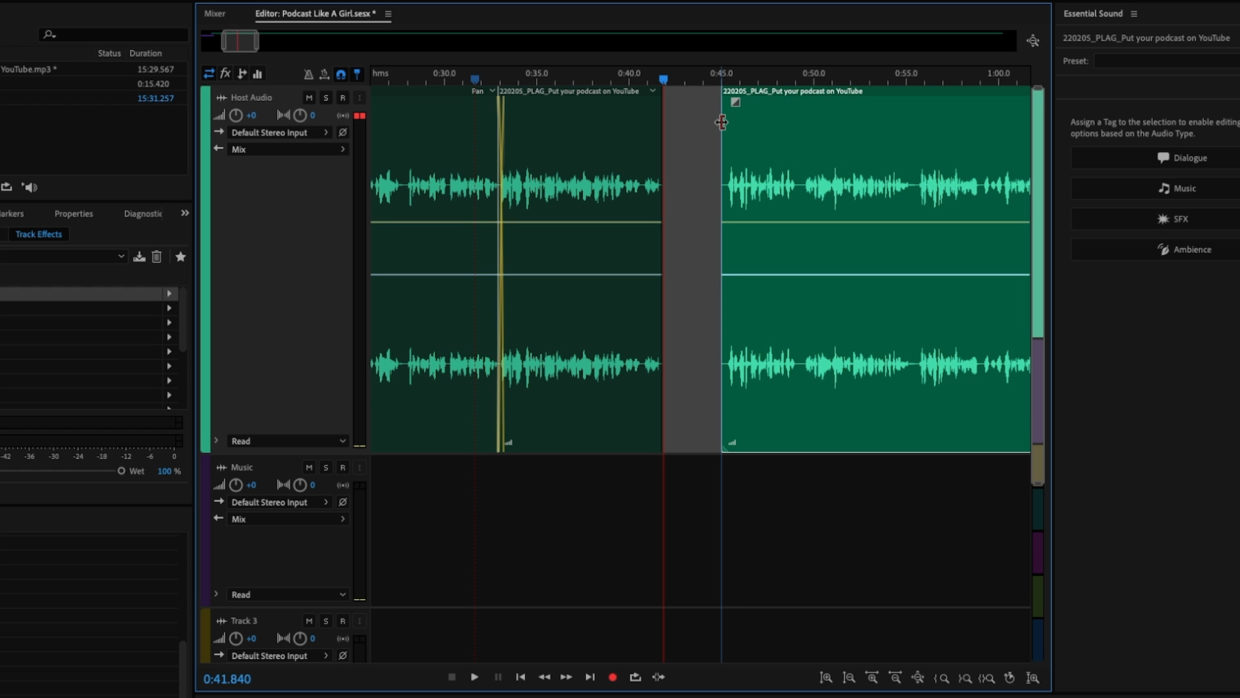
Phase 4: The Cutting Process
Now that your audio is sounding professional, dive into your episode and begin cutting any unnecessary content or problem areas.
Cut For Story
A good podcast episode should flow from beginning to end. Cut sections where hosts ramble, there are foreign noises, bad takes, or even whole sections of discussion if they don’t relate to your episode’s topic.
You might be editing your own podcast but there is something to be said about an external and unbiased party deciding what needs to be cut.
The general rule of thumb is this – if it wastes your audience’s time, cut it.
Phase 5: Add Music
Utilize music stings to transition in and out of your podcast as well as sections with your podcast such as add breaks.
This is another layer of polish as well as a mood setter for the content people are coming to listen to.
The length of these music sections varies on podcasts but a good range is 10-15 seconds.
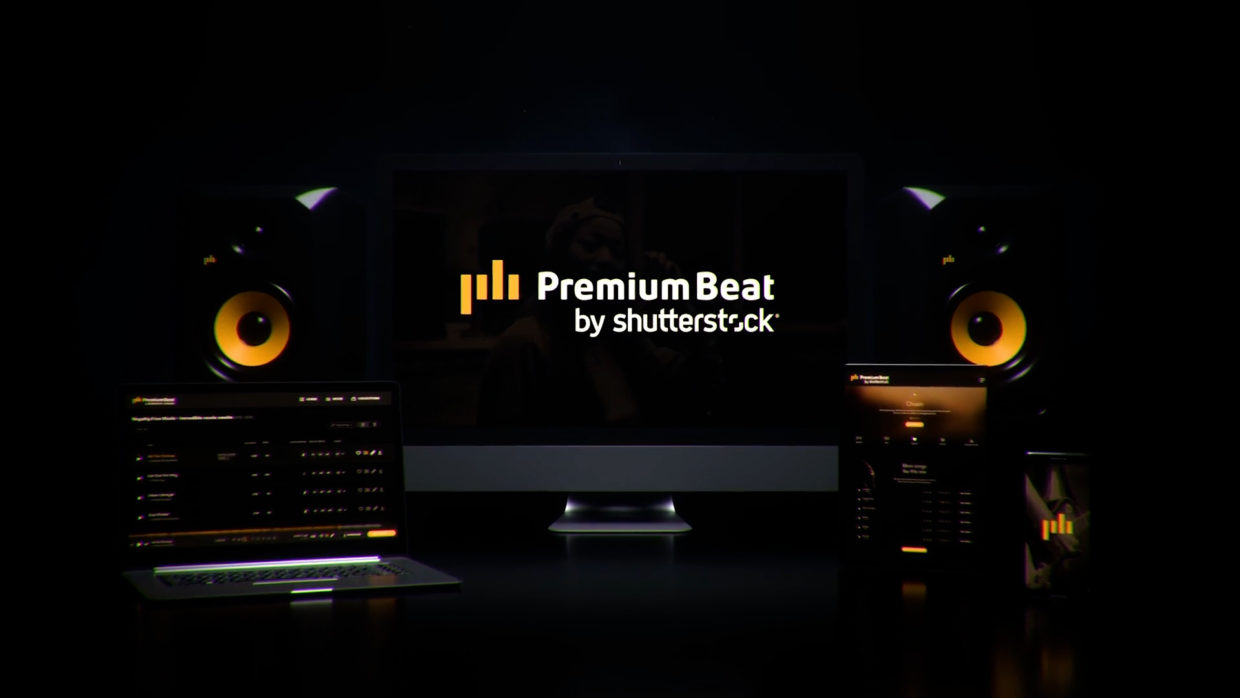
Royalty-Free Options
If custom-made music is out of your budget, there are plenty of royalty-free options available that are reliable and cost effective.
The only potential downside to these services is that other podcasts can be using the same music you are.
• Artlist
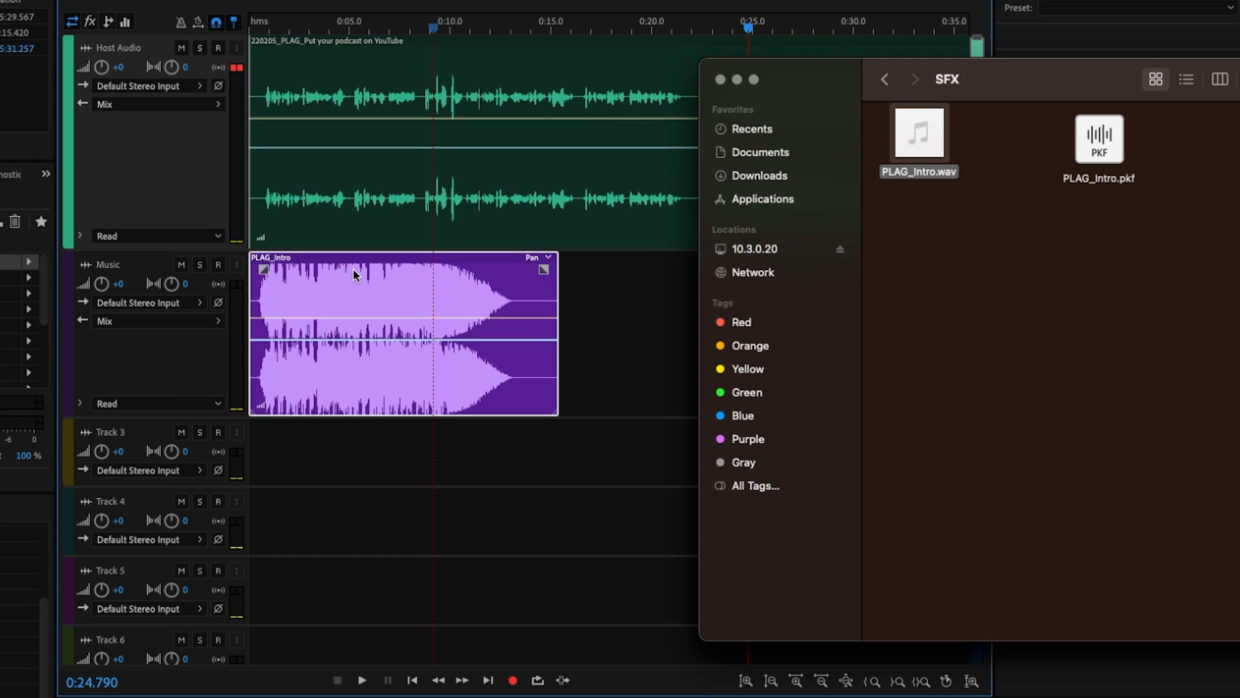
Phase 6: Add Intro / Outro & Ads
Intros and outros are great spots to set up the topic of the show and introduce the personalities of the hosts.
These can be part of the main recording on the day or recorded separately altogether for dynamic insertion.
Dynamic Insertion vs Baked In
Baked-in means the intro, outro, or ad are part of the rendered file. This is simpler to do but lacks versatility once the episode is uploaded.
Dynamic Insertion on the other hand uses markers in your episode metadata to place intros, outros, and ads at specific parts of the show. All through your hosting platform.
The great thing about dynamic insertion is that you can change those parts after uploading, giving you more versatility with ad campaigns or other insertions.
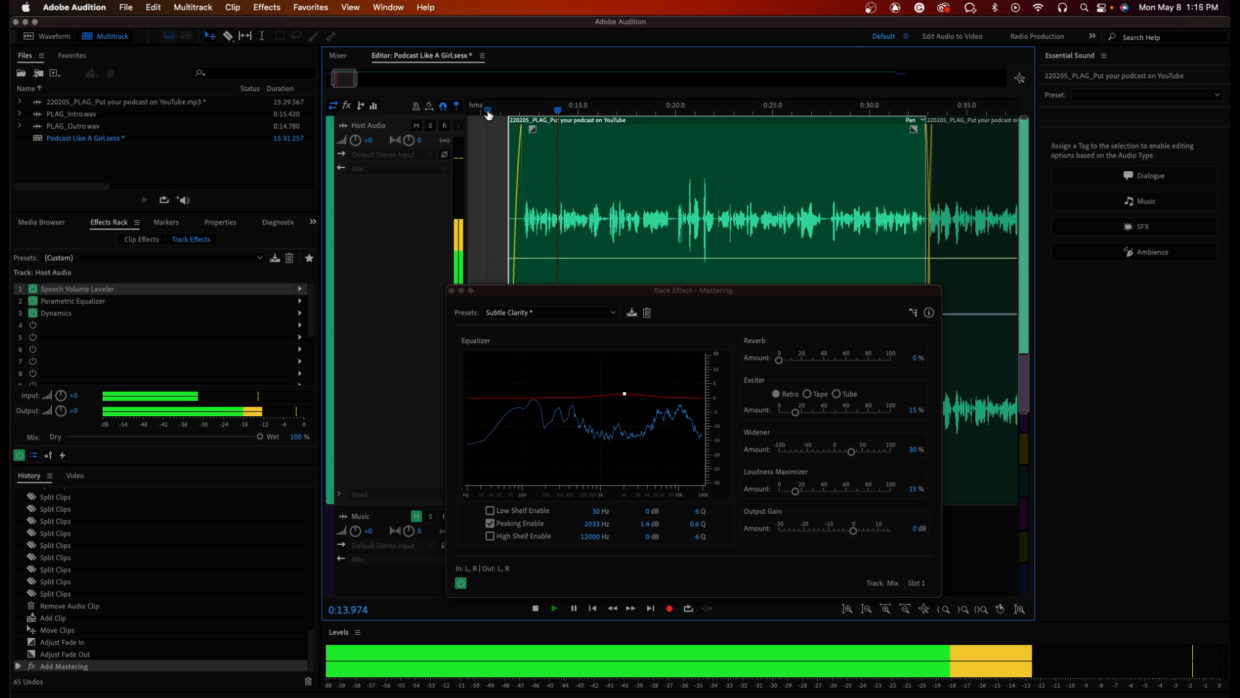
Phase 7: Mastering
Mastering optimizes the overall audio quality and loudness to ensure it plays effectively across all platforms.
Simply, it’s that “shine” or “polished” sound that people associate with professional podcasts.
The Final Touch
• In your multitrack session, scroll down and select the mix track.
• Go to effects, special, and then mastering.
• In the drop-down select subtle clarity
• Reduce the reverb to zero% and take in the finished sound.
• These settings add one last bit of polish and warmth to make your sound as good as possible.
Phase 8: Exporting
Podcast hosting platforms and RSS feeds require very specific files to work properly.
Luckily it is pretty consistent across all platforms so you will only need to export one version of the file.
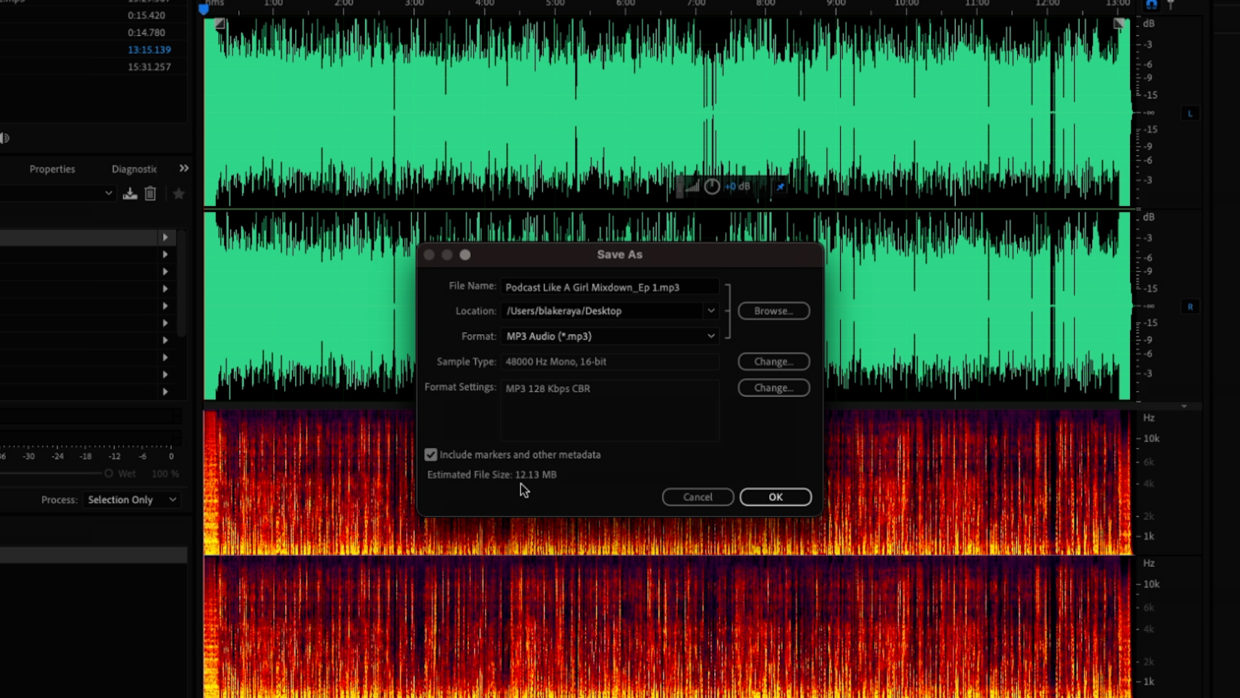
Standard settings
These settings were chosen based on information from Apple’s audio requirements.
• In your multitrack session, select the multitrack drop-down, mixdown session to a new file, then entire session.
• Inside this mixdown select file and Save As.
• For your format pick mp3 and then click the sample type drop down.
• Set your sample Rate to 48000, your channel to mono, and the bit depth to 16.
• In your format settings select constant and then 128kbps.
• Ideally, your file size should never be more than 150Mbs.
Get Podcasting
With that, you’re ready to edit your first-ever podcast!
For more podcasting tips, check out our previous article on How To Record a Remote Podcast!